
The following is the method to strip the Mle 92/27. The most difficult part is the removal of the barrel bands, and it is possible to scratch the barrel or wood of the rifle while removing the bands. I do not explain how to remove the items, only the order in which they should be removed. Be careful, and if in doubt, have a professional perform the breakdown and cleaning of the rifle. A final note, with the gun cleaning supplies currently on the market, the only reasons to break a rifle down now adays is to inspect the parts for damage and pitting and to remove excessive greases and grims present due to prolonged storage. In other words, this is not a routine cleaning operation and should be performed only when necessary. Everytime a rifle is fully broken down, there is a chance of scratching the blueing off the parts, damaging the wood, and wearing down or damaging the screws.
I have also included some photos of the various parts of the Mle92-27 that appear after the breakdown sequence.
The following steps assume that the bolt has already been remove. When you click on the thumbs, a larger copy of the image will load into a new window.
Step 1:

First, remove the barrel bands, the front one by the front sight first, then the rear band. There are no locking screws on the bands, just depress the band-locks and slide the bands off, and yes, I know that is easier said than done. This is the tough part, slow and easy is the call of the day.
Step 2:

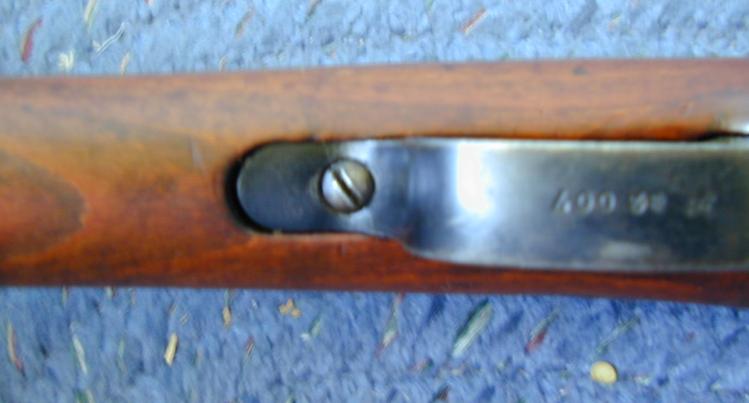
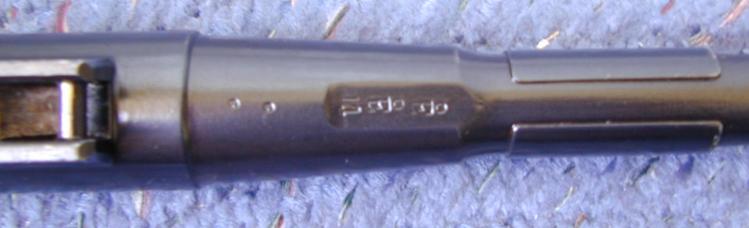
Now on the bolt handle side of the rifle (right side), locate the above screw (one in blued area inside of the stock cut-out). This is a locking screw that passes through the receiver and the trigger group. Remove this screw.
Step 3:
Now, locate the above screw. This screw is located at the rear of the trigger guard on the underside of the rifle. This screw attaches the trigger group to a metal locking block in the stock. Removing this screw will release the trigger group.
Step 4:

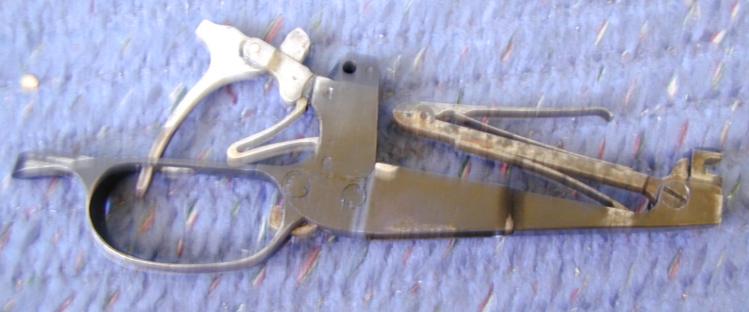
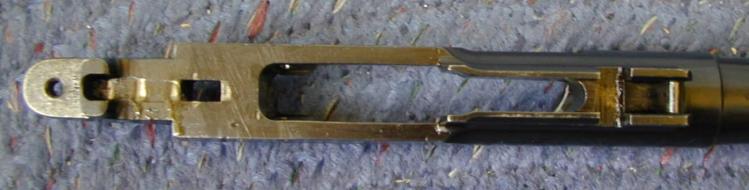
Now grasp the rear of the trigger guard and pull down in an arcing motion towards the front of the rifle. Once the rear section of the trigger group has "dropped" down as seen in the photo, then pull the trigger group back towards the rear of the rifle. This is the procedure because the front of the group has a semi-circle piece of metal that slides over a round locking bar in the bottom of the receiver (shown in the "Bottom View" below). If you look closely at the photo at the top right end of the group, you can see this semi-circle just appearing out of the stock. Once the trigger gruop has been removed you will note that the Mannlicher clip system is attached to the trigger group and shares the same base plate.
Step 5:

Now that the trigger group with attached Mannlicher system have been removed, look at the bottom of the stock at the rear of the cut-out and locate the flate-head screw as shown on the photo. This screw locks the receiver and barrel group to the stock. Remove this screw to free the reciever and barrel.
Step 6:
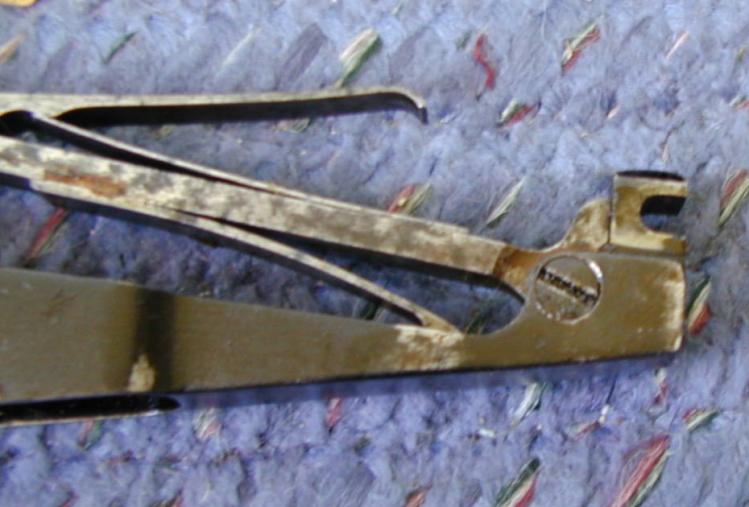
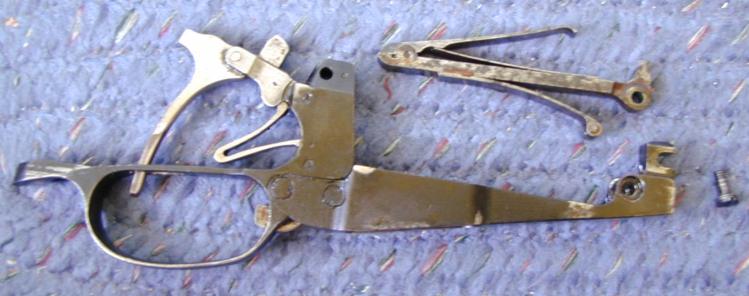
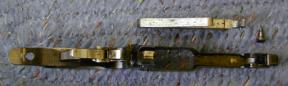
Take the trigger group and place it with the trigger pointing down and towards the left as shown on the first photo. The semi-circle piece of metal should be at the left end, located beneath it is a flate-head screw. Remove this screw to free the clip feeder spring as shown in the following first photo.
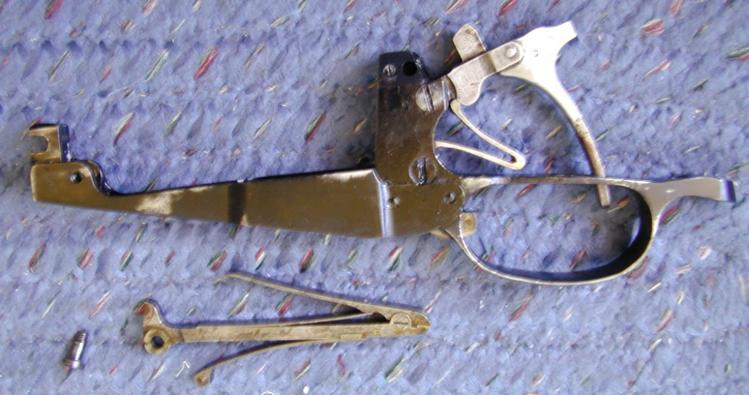
This is as far as I take it, I do not remove the actual trigger. The screws for doing this are on the opposite side of the group as shown on the above left photo..
That's it!, the rifle has now been broken down to the point shown on the main site photo at the top of the web page. The following are pics showing various parts of the rifle that are now exposed.
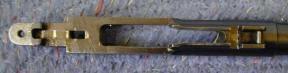 Top View of Trigger Group Bottom View of Receiver

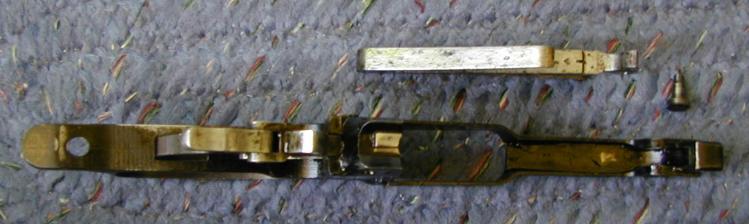
 Bottom View of Reciever Ring 4-Screws (left to right) Clip Spring (Step 6)
attaching receiver & barrel to stock (Step 5)
attaching trigger group to stock (Step 3)
locking screw, trigger to receiver (Step 2)
Bottom View of Reciever Ring 4-Screws (left to right) Clip Spring (Step 6)
attaching receiver & barrel to stock (Step 5)
attaching trigger group to stock (Step 3)
locking screw, trigger to receiver (Step 2)

 Back to Mle92-27 Homepage
Back to Bolt Disassembly
Back to Photos Main Page
Back to Mle92-27 Homepage
Back to Bolt Disassembly
Back to Photos Main PageThe author retains all rights to any and all photos and they may not be used for profit without explicit, written permission from the author.
Last Updated 09/10/01